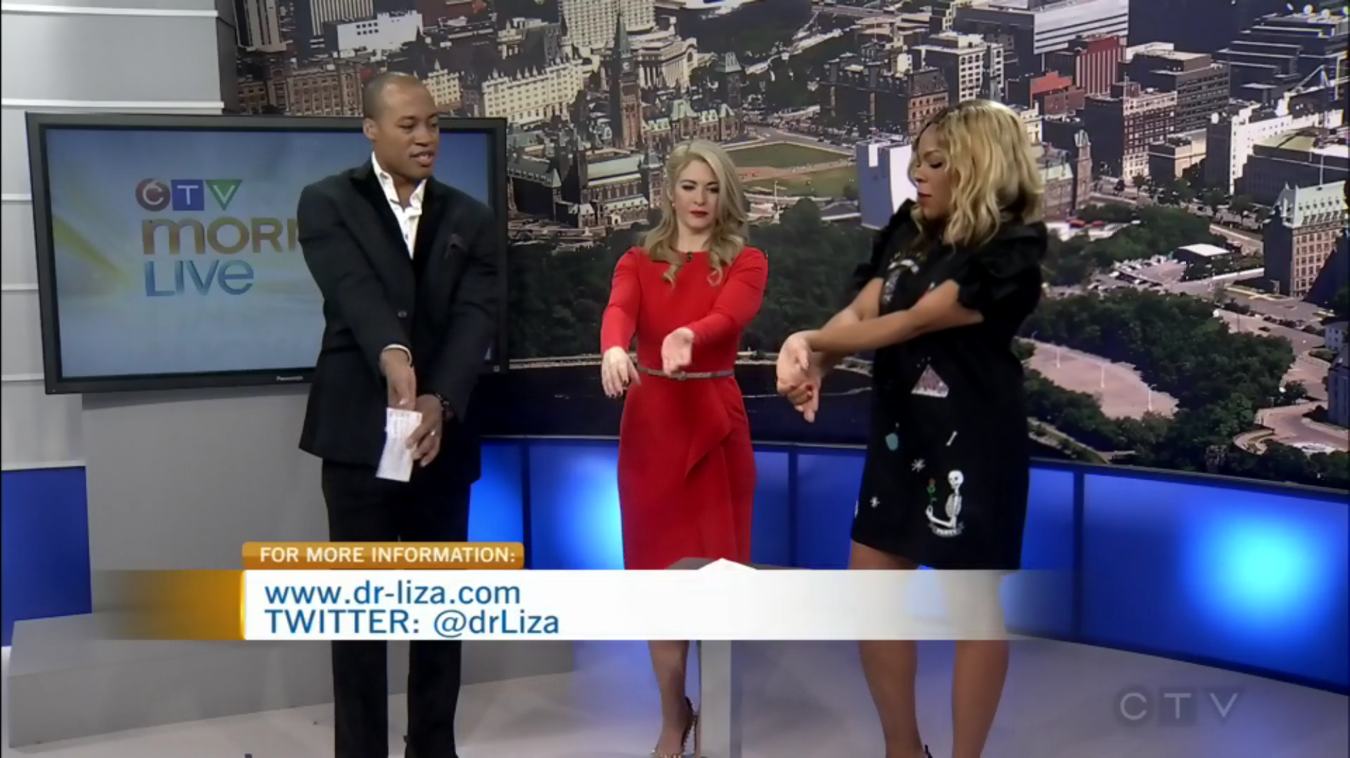
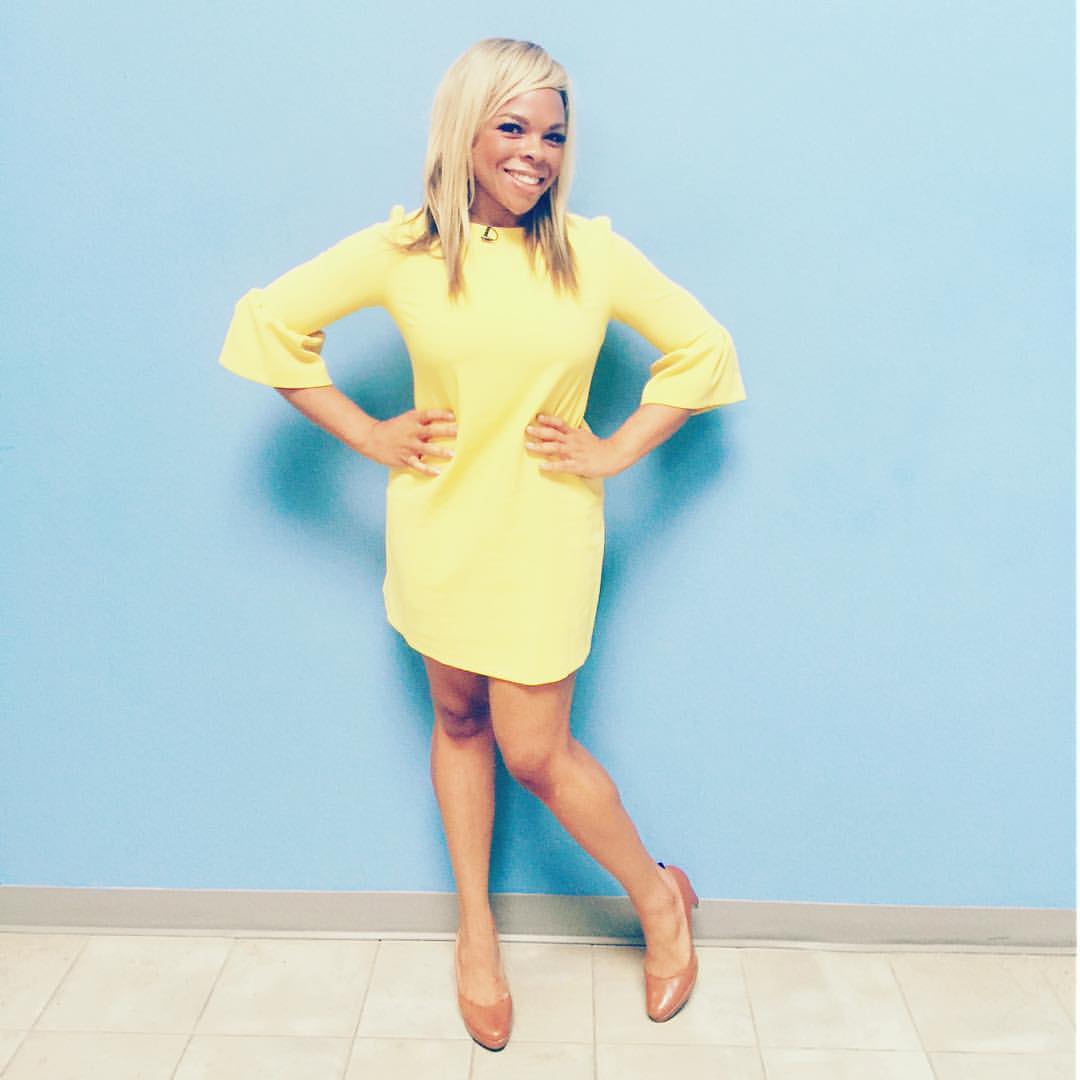
The Morning Show - High Heel Mistakes
/I had a great time at The Morning Show sharing the top mistakes women make when shopping for heels and what makes the dr. Liza pump different. Watch the segment here:

I had a great time at The Morning Show sharing the top mistakes women make when shopping for heels and what makes the dr. Liza pump different. Watch the segment here:

Dr. Liza shared the mistakes women make when shopping for high heels and some of the features that make the dr. Liza pump comfortable enough to wear for 12 hours! Watch the clip here:
Get your beauty sleep with these awesome moves!
http://www.thesocial.ca/Wellness/Health/These-stretches-will-help-you-sleep

Deep Relax Breathing
To try this relaxing breathing exercise, you can either sit up crossed-legged or lie down on your right side. Cover the right nostril with your thumb and extend the fingers out. Then take five to 10 deep breathes out of your left nostril.
Benefits
It encourages relaxation by balancing out the left and right sides of your brain and calming the nervous system.
Rock-a-Bye Roll
Lying on your back, hug knees in to chest. Cross your ankles and wrap both arms around your shins with clasped hands. Inhale and rock your body up to sit; exhale as you roll back.
Benefits
This is a very calming pose. Think about rocking a baby to sleep. The rocking motion in itself helps to calm the nervous system to prepare you for a deep sleep.
Happy Baby Pose
Lie on your mat and pull your knees to your chest. Place hands on the outsides of your feet, opening knees wider than your torso. Press feet into hands while pulling down on feet, creating resistance. Breathe deeply, holding for up to 1 minute.
Benefits
Similar to the calming effects of the rock-a-bye-roll exercises, the happy baby calms the brain and helps relieve stress.
Nighttime Goddess Stretch
Lie on your back with knees bent. Place the soles of your feet together, then let your knees fall open, forming a diamond shape with your legs. Use your hands to gently push your knees down towards the ground. If you feel any strain, elevate your legs by placing a pillow underneath each knee.
Benefits
This stretch relaxes your body to promote restful sleep. It also feels really great!
Standing Forward Bend
Stand with feet hip-width apart and with a slight bend in the knees. Slowly bend forward and hold your elbows. Exhale and lengthen down through the crown of your head. To come up, release your arms, root through your feet, and slowly rise.
Benefits
It calms the brain and helps relieve stress and anxiety. In yoga this pose has been traditionally used to treat insomnia.

FLASH SALE! Use the code 'SPRING20' to take 20% off the dr. Liza pump from now until April 7th at midnight. Shipping is free within Canada and the US. Shop at drLizashoes.com or at the[fix]

THE RED CARPET FIX. Learn how the stars are getting ready for the JUNO awards and 2 great stretches you can do to help relieve neck, elbow and hand pain. Watch the segment here:
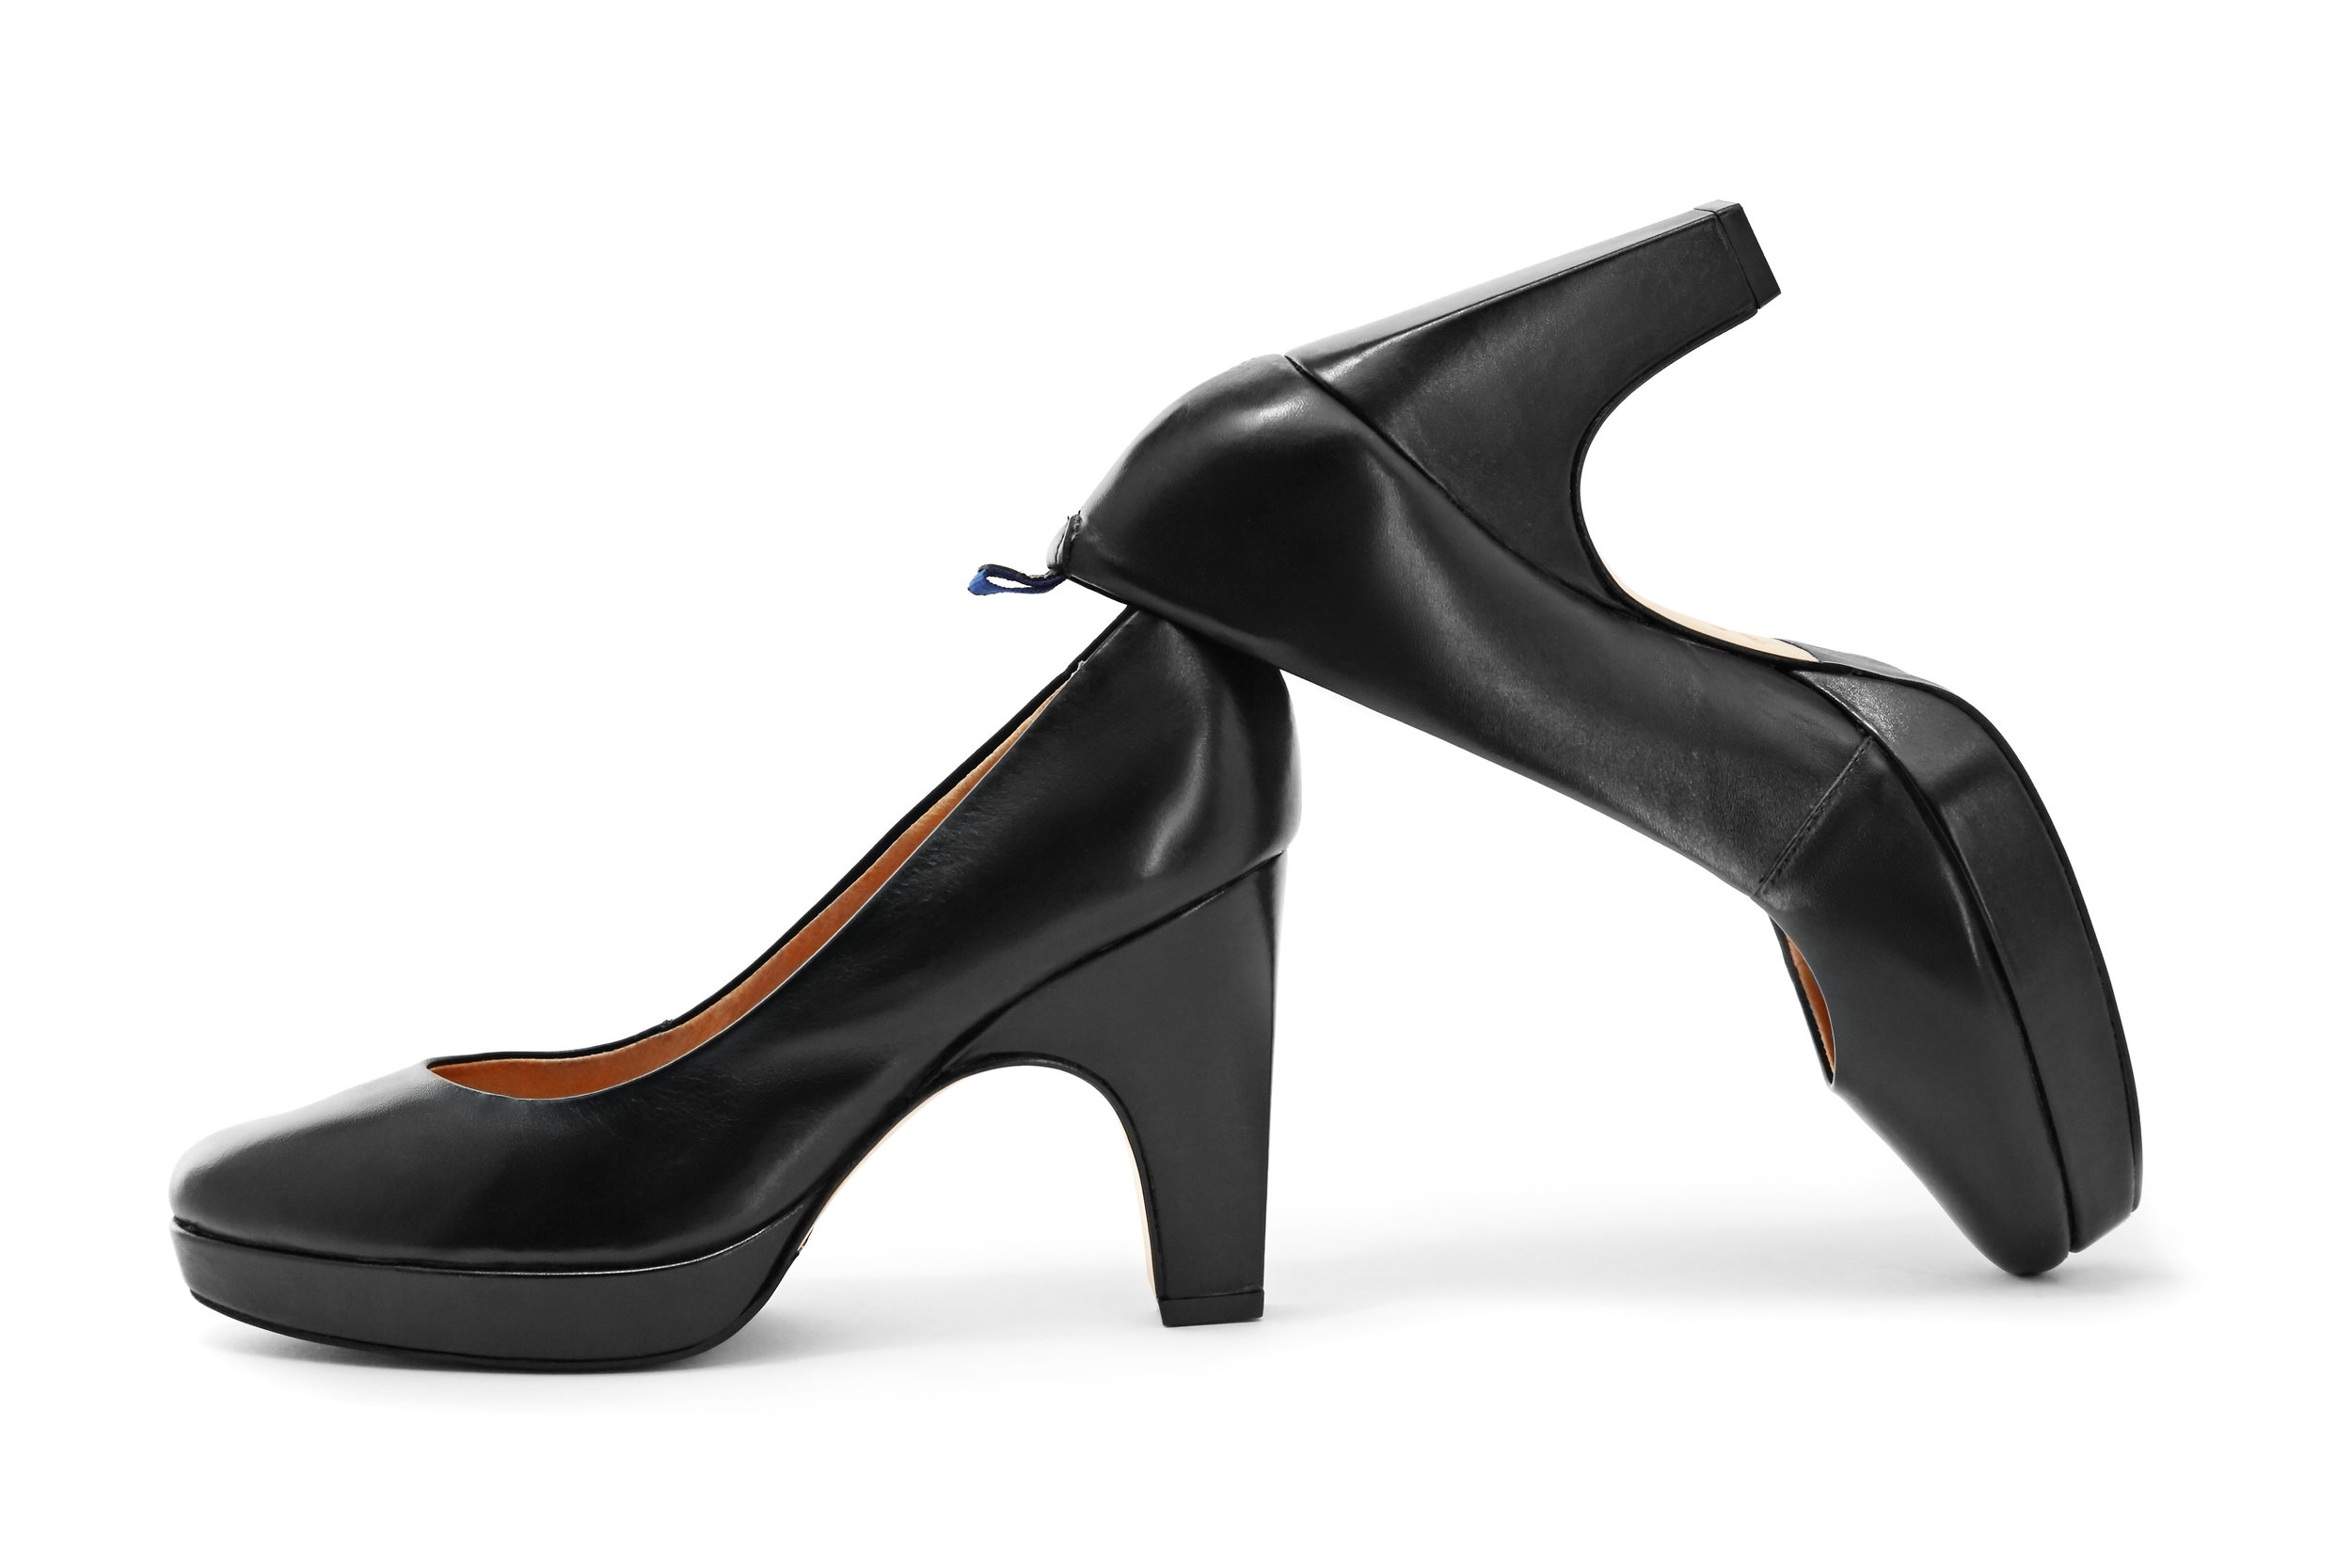
It was a pleasure to be on Daytime York this morning talking about what to look for when choosing a high heel. Missed today's segment? Here are some things you want to look for:
1. Platform
2. Sturdy heel
3. Rubber grip
4. Orthotic insole
5. Comfortable fit
And all of these great qualities can be found in the dr. Liza pump 👠


ORTHOTIC INSOLE Feature advanced foam cushioning and contoured arch support for all day comfort and long-term wear. The orthotics in the dr. Liza pump are engineered to provide biomechanical support and correction with every step.
EVA PLATFORM The platform is made of shock-absorbing EVA to make every step cushiony and comfortable.
ROCKER SOLE The forefoot platform rocker sole off loads weight at the metatarsal heads [ball of your foot]. This means little pressure at the front of your feet when you are standing or walking.
NON-SKID RUBBER OUTSOLE Provides traction and shock absorption to keep you grounded and balanced with every step.
DEEP HEEL CUP Gives you greater stability by controlling over pronation [when your feet roll in too much]. It also helps to gather the fat at the bottom of your heel to provide additional cushioning.
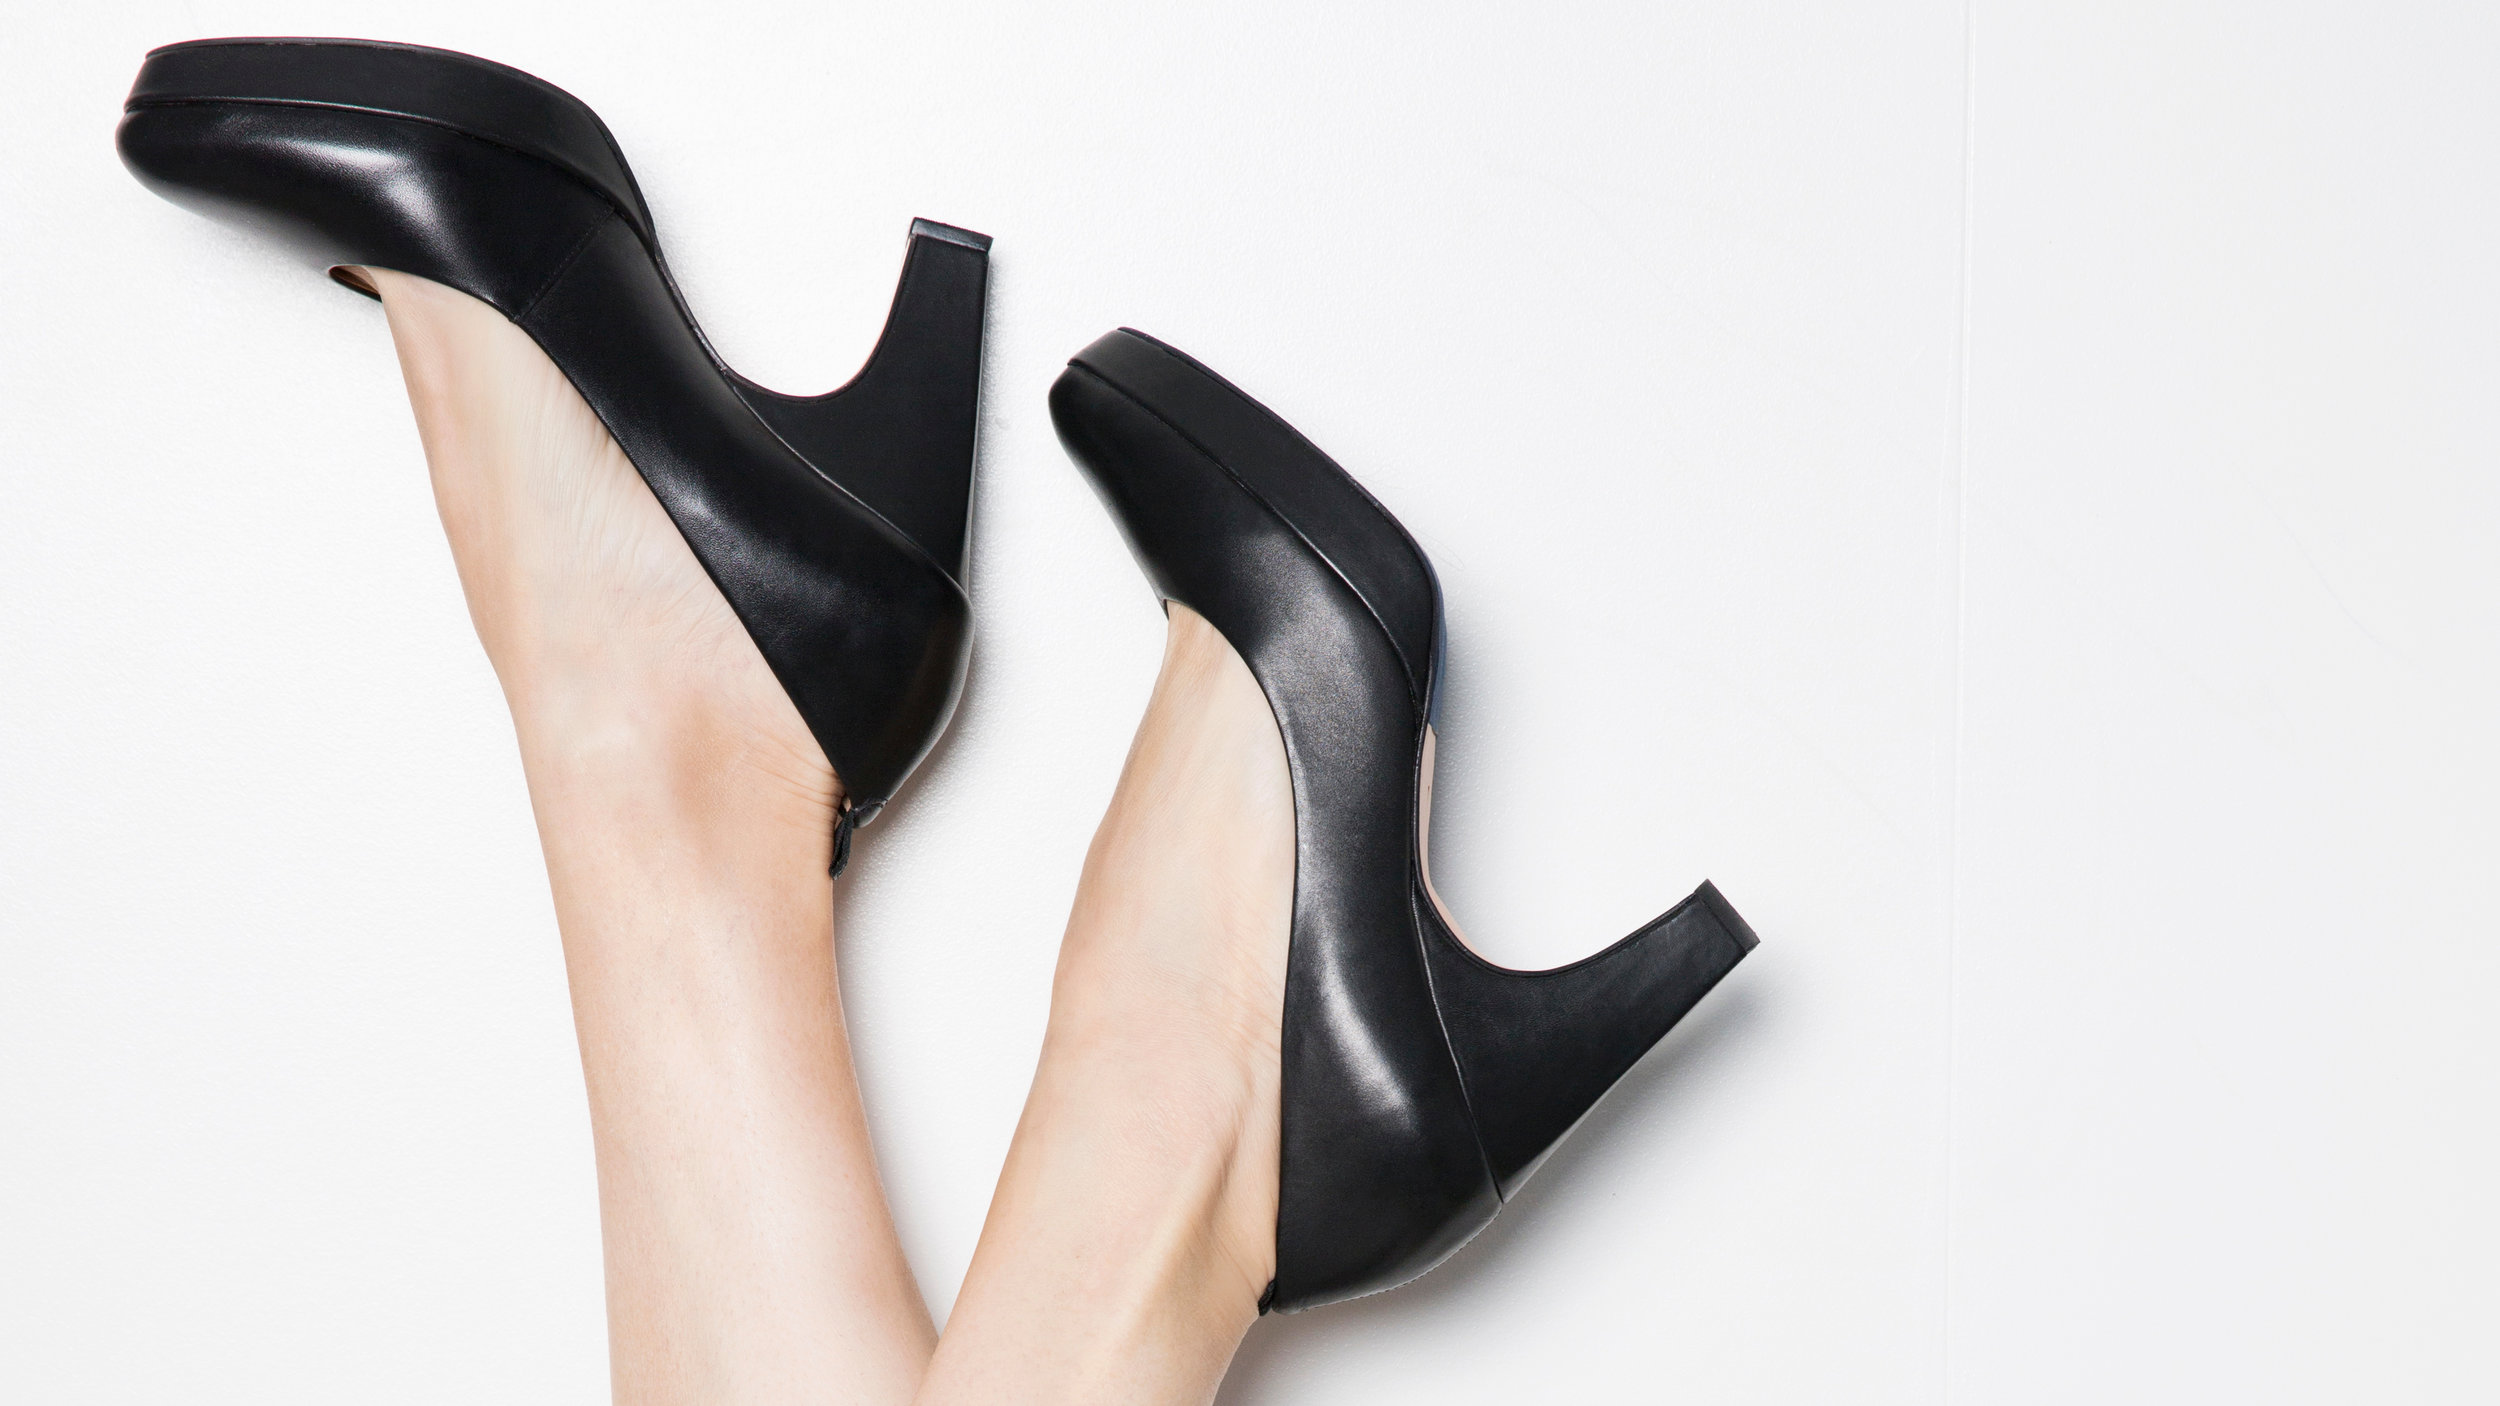
ORTHOTIC INSOLE Features advanced foam cushioning and contoured arch support for all day comfort and long-term wear. The orthotics in the dr. Liza pump are engineered to provide biomechanical support and correction with every step.
EVA PLATFORM The platform is made of shock-absorbing EVA to make every step cushiony and comfortable.
ROCKER SOLE The forefoot platform rocker sole off loads weight at the metatarsal heads [ball of your foot]. This means little pressure at the front of your feet when you are standing or walking.
NON-SKID RUBBER OUTSOLE Provides traction and shock absorption to keep you grounded and balanced with every step.
DEEP HEEL CUP Gives you greater stability by controlling over pronation [when your feet roll in too much]. It also helps to gather the fat at the bottom of your heel to provide additional cushioning.

I'm so excited to launch my Kickstarter campaign for the dr. Liza pump. I've been working for almost 2 years to create a 3.75" pump that you can comfortably wear all day.
By backing this project you will be rewarded with the dr. Liza pump at a discounted price. Even if you don't want the shoe you can still support the campaign by contributing as little as $10.
I would be forever grateful if you would support this endeavour 🙏#imbeggingplease
Here's the link for the Kickstarter campaign :
https://www.kickstarter.com/proj…/971859523/the-dr-liza-pump
I only have till February 14th to raise the funds!! Please share. Pretty please!!
Learn more about the dr. Liza pump at drlizashoes.com

If we told you there's a way to treat back pain while simultaneously making your stomach look flatter, would you believe us? Liza Egbogah says it's true!
See below for the celebrity chiropractor's treatments and stretches that can do the trick.
When your pelvis is tilted forward due to tight hip flexors, this can make your stomach stick out giving you the appearance of a protruding abdomen. Normalizing your pelvic tilt will cause your stomach to be flatter and look more toned. This treatment can also help to reduce bloating and the appearance of abdominal fat rolls.
The treatment includes myofascial release and manual stretching of the abdominals, hip flexors and quadriceps; percussion therapy on the stomach; chiropractic adjustments on the lower back and mobilizations of the hips
Hand to Floor Dancers Pose
Stand with your feet together. Inhale, shift your weight onto your right foot, and lift your left heel toward your left buttock as you bend the knee. Press the head of your right thigh bone back, deep into the hip joint, and pull the knee cap up to keep the standing leg straight and strong. Slowly bend forward to touch the floor in front of your while you kick your left heel back as you try to extend your leg. Stay in the pose for 20 to 30 seconds. Then slowly come back up to standing and release the grasp on the foot, place the left foot back onto the floor, and repeat for the same length of time on the other side.
BENEFITS: Tight hip flexors can cause your pelvis to tilt forward; giving the appearance of a protruding abdomen. This yoga pose not only helps to stretch your hip flexors but it also strengthens your core, glutes and legs.
Tree Pose
Stand with your feet together. Shift your weight slightly onto the left foot, keeping the inner foot firm to the floor, and bend your right knee. Reach down with your left hand and clasp your right ankle. Draw your right foot up and place your foot at the front of your left hip. As you continue to hold your right foot with your left hand, bring your right hand up to the center of your chest. Stay for 30 seconds to 1 minute. Bring your foot back down to the ground with an exhalation and repeat for the same length of time with the legs reversed.
BENEFITS: Tree pose provides a great stretch for the hip flexors and groin so not only does it help correct anterior pelvic tilt it also improves overall alignment and posture. Your core muscles are also working in this pose which means a tighter midsection.
Eagle Pose
Stand with your feet together. Bend your knees slightly, lift your left foot up and, balancing on your right foot, cross your left thigh over the right. Point your left toes toward the floor, press the foot back, and then hook the top of the foot behind the lower right calf. Balance on the right foot.
Stretch your arms straight forward and cross the arms in front of your torso so that the right arm is above the left, then bend your elbows. Snug the right elbow into the crook of the left, and raise the forearms perpendicular to the floor. Press the right hand to the right and the left hand to the left, so that the palms are now facing each other. The thumb of the right hand should pass in front of the little finger of the left. Now press the palms together (as much as is possible for you). Stay for 15 to 30 seconds, then unwind the legs and arms and repeat for the same length of time with the arms and legs reversed.
BENEFITS: Eagle pose is a great posture for improving lymphatic drainage and digestion. This means less water retention and bloating which ultimately leads to a flatter stomach.
Alternating Stars
Start with your feet together. Slowly bend to the right as you reach your right hand to touch the ground beside you. Exhale, press your right hand and right heel firmly into the floor, and straighten your right leg, simultaneously lifting the left leg parallel (or a little above parallel) to the floor. Extend actively through the left heel to keep the raised leg strong. Lower the raised leg to the floor with an exhalation and return the pose to the left for the same length of time. Alternate between sides 10 times.
BENEFITS: This is one of the best stomach toning yoga poses that you can do. Your oblique and deep core muscles are working here while they are also being stretched to help elongate your midsection.
Deep Squats
Start with your feet shoulder width apart. Slowly bring your buttocks down towards the ground into a deep squat. Ensure that the front of your knees never go past the front of your feet. Keep your heels on the floor if you can. Extend your arms out in front of you. Separate your thighs slightly wider than your torso. Exhaling, lean your torso forward and fit it snugly between your thighs. Hold the position for 5 seconds then inhale, straighten the knees, and stand. Repeat 10 times.
BENEFITS: Your core muscles have to work very hard in this movement while also creating a great stretch in the hips. The deep squat also helps to encourage great alignment so that your overall posture will be better and your stomach will look considerably flatter.

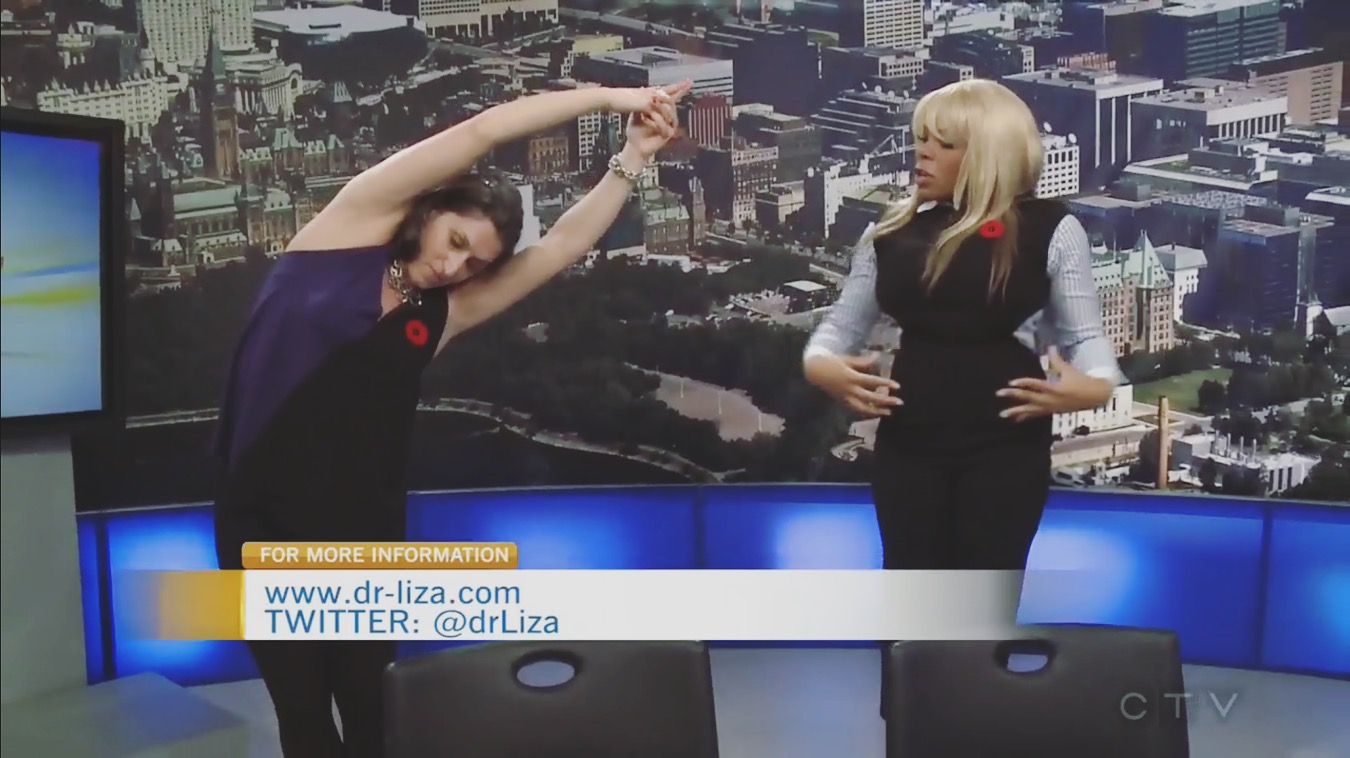
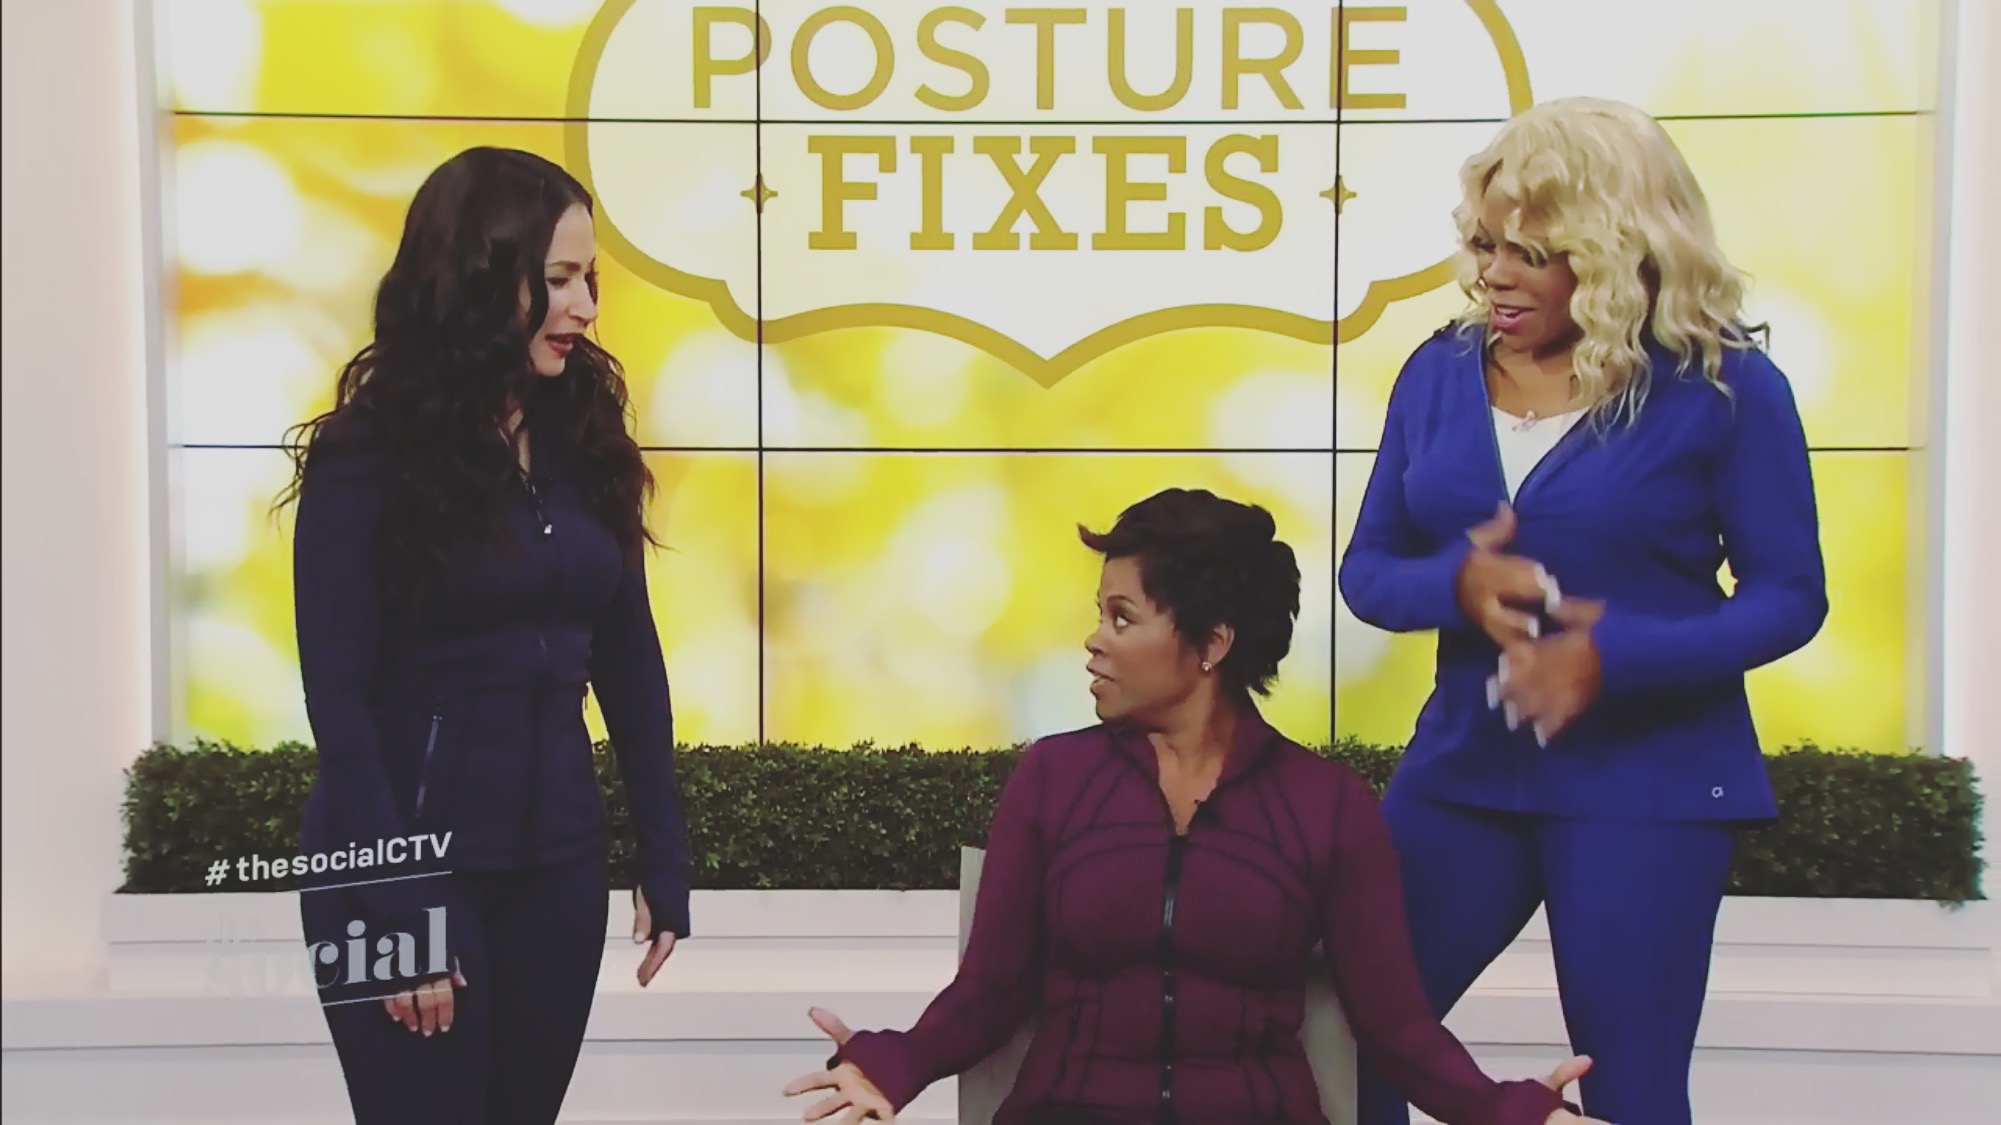
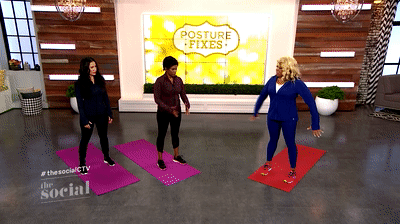
Do you spend too much time sitting? Do you work at a desk? Are you guilty of too much time texting? Your posture may be suffering as a result. Watch the segment below to learn 3 great exercises that you can do to improve your posture and counteract some of the effects of sitting!
Watch the full segment and get detailed descriptions for the 5 exercises you can do to get a natural breast lift at: http://www.thesocial.ca/Wellness/Fitness/2016/September/These-stretches-could-give-you-a-natural-breast-li

Half Moon Pose
Double Angle Pose

Triangle Pose

Camel Pose
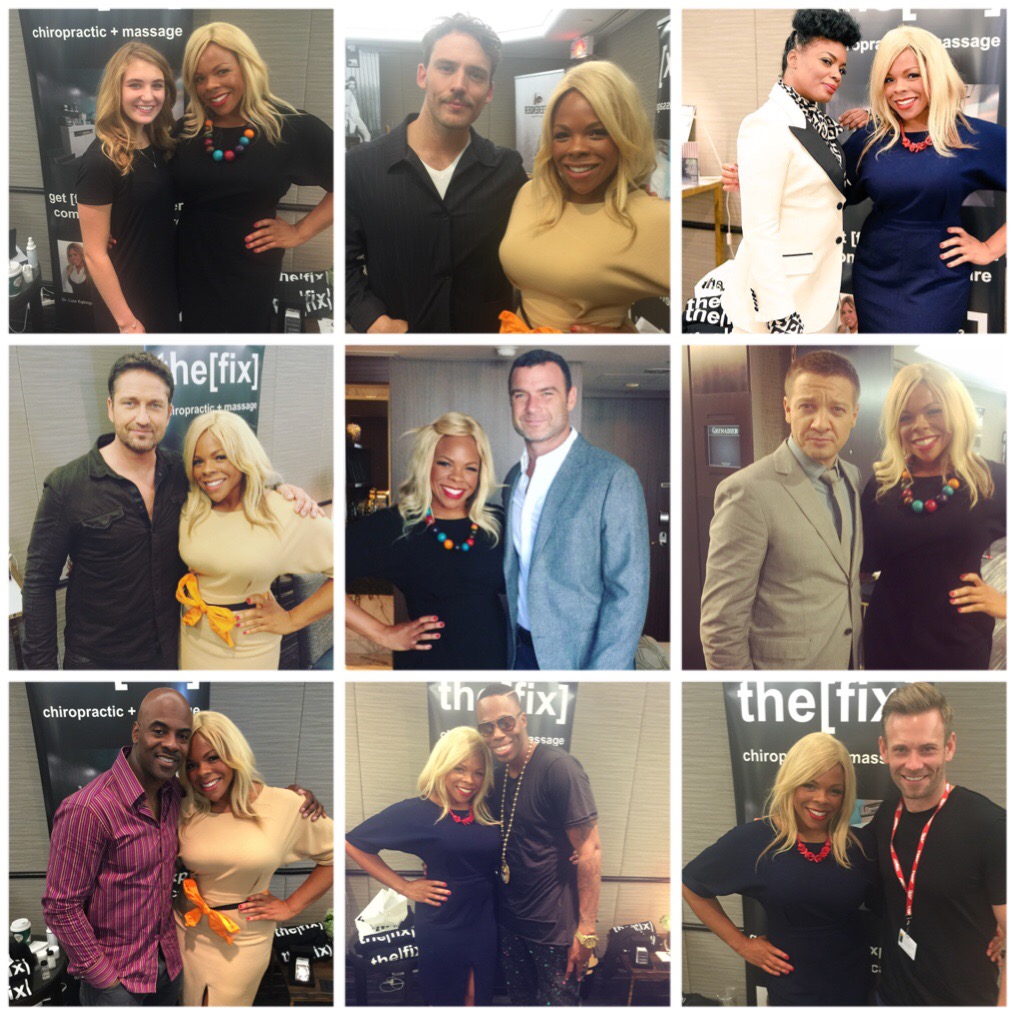
Sophie Nelisse, Sam Claflin, Aunjanue Ellis, Gerard Butler, Liev Schreiber, Jeremy Fenner, Maestro Fresh Wes, Kardinal, Eric Johnson, Erika Linder, Allan Hawco, Kreesha Turner, Michael Smiley, Rita Udominic, Chidi Mokeme, Michael Smiley and Mark Hildreth were just some of the awesome actors I got to meet at TIFF 2016!


Visit http://www.thesocial.ca/Wellness/Fitness/2016/July/High-heel-stretches for the video!
July 25, 2016
THE SOCIAL
Wearing high heels is a common source of foot, ankle, knee, hip and back pain for many women. High heels cause your pelvis to tilt forward leading to tight hip flexor muscles. This puts stress on your lower back and the ligaments at the front of your knee potentially causing back pain, knee pain and even torn ligaments at the front of your knee. Studies have shown that just a 2 inch heel puts 23% more load at the front of your knee.
Standing or walking in heels for long periods of time will also cause your calf muscles to tighten and your Achilles tendon to shorten, which can lead to calf strains and Achilles tendonitis. It only takes 6 months of wearing heels for your Achilles tendon to shorten.
An inch of heel height tilts you forward about 10 degrees. Since your weight is shifted forward to the balls of your feet, you are no longer using your arches to balance your weight. This can cause inflammation in the nerves that run between your toes leading to foot pain and the formation of bony growths like bunions.
DANCER’S POSE
What it does: Wearing high heels causes the hip flexors resulting in your pelvis tilting forward. This posture not only helps to stretch your hip flexors but it also strengthens your core, glutes and legs simultaneously which are all responsible for stabilizing you while you walk in high heels.
STANDING ADDUCTOR STRETCH
What it does: This exercise strengthens the legs and ankles, stretches the backs of the legs and improves your balance. By doing this exercise you will have more stability while wearing high heels and be able to walk in them comfortably for a longer period of time.
STANDING HAMSTRING STRETCH
What it does: This is a great stretch for the hamstrings and calf muscles. Since the calf muscles and hamstrings shorten when you wear heels it is important to elongate and stretch them to prevent calf, foot and Achilles problems.
TOPPLING TREE
What it does: By engaging your glutes and core at the same time, this pose helps to strengthen to muscles necessary to walk in high heels. Balancing while you are toppled forward also helps to strengthen the arches in your foot to provide additional support while you are wearing heels. This will help prevent foot problems like neuromas and bunions.
ANKLE CIRCLES
What this does: Wearing stilettos can restrict the amount of circulation going through the ankle and foot. By moving your ankles in circles, you create a dynamic stretch that allows for better blood flow and less swelling and pain in your feet.

Click the link below to learn what the baby bird is and 4 other postures that will have you looking younger.

http://www.thesocial.ca/Style/Beauty/Chiropractic-beauty-treatments

From top left to bottom right moving clockwise:
1. Pectorals stretch | Interlock your fingers behind your back. Pull your hands down towards the ground and squeeze your shoulder blades together. To squeeze your shoulder blades together, imagine that there is a pencil along your spine that you are trying to hold in place. Hold this for 5 slow seconds.
This is a great stretch for your pectorals. It also helps to lower your shoulders and strengthen the stabilizer muscles in your middle back.
2. Back bend | Interlock your fingers and bring your arms directly over your head. Look up to the ceiling and then to the wall behind you if possible. Plant your feet to the ground. Let your arms follow so that you are arching backwards. You should feel a stretch at the front of your hips and feel yourself arching backwards. Take a deep breath in and as you exhale, arch back a little bit more. Try to complete 5 deep breaths and come back up back to a standing position.
This is a great stretch because it helps to stretch your hip flexors, strengthen your core and decompress your spine.
3. Camel pose | Kneel on the floor, preferably on a mat. Let your shins lie flat on the mat while your upper legs are perpendicular to the mat. Start by placing your hands on the back of your hips and look backwards as you arch back. If you can see the wall behind you, take your hands and hold onto your heels. As you look back you should feel a stretch at the front on your hips and shoulders. Hold this for 5 slow breaths. Ensure that you come out of this posture as slowly as you went into it.
This will help to decompress the spine, stretch the hip flexors and stretch the pectorals.
4. Calf stretch | While standing keep both legs straight. Move the leg that you are stretching directly in front of you. Place the heel on the ground and point the toes up to the ceiling [ankle dorsiflexion]. Slowly bend forward towards the ground ensuring to bend from the hips while keeping your back flat. You should feel a nice stretch in your calf muscle. Hold this for 10 breaths and come up slowly.
By holding up your foot instead of using a step you are activating the muscles at the front of your leg which allows for a deeper stretch of the calf.
5. Tree pose | Stand with your feet shoulder width apart and bring your heel up to the front crease of the opposite hip. Lengthen your core and imagine that you have a string attached to your head that is pulling you back. Slowly try and push your bent knee backwards so that it is inline with the front of your hips. Hold this position for 10 slow seconds.
This pose is a great hip opener, helps with balance and stability and improving posture.
6. Quad stretch | Stand with your feet next to each other, use both hands to bring your heel back to your buttocks. Hold this stretch for 10 slow seconds.
This will help to stretch your quadricep muscles and stretch your pectorals.
Dr. Liza Egbogah is a Myofascial Release expert, Manual Osteopath and Chiropractor in downtown Toronto. She specializes in aesthetic and emotional trauma fascial release and is clinic director of the[fix], downtown Toronto's boutique osteopathy and myofascial release clinic and founder of dr LIZA shoes, designer dress shoes that feel and function like sneakers. Dr. Liza is renowned for her innovative treatment protocols and boasts a long roster of celebrities and business leaders. She is a sought after fascia and posture expert and is a regular media contributor.